This is a scarf for which I tied a new warp on to the previous warp on my Ashford Table Loom, a 16 harness point twill threading. I am using up balls of hand dyed 8/2 rayon, and the effect I am getting is nicely iridescent. I am using the same design as in the scarf below.
(This design is not shareable, as it was given to me by another weaver.)
It’s been rather slow going, as I am having a bit of trouble getting the height of my weaving bench just right. My back doesn’t like weaving sessions to go on too long. The challenge is getting the beat just right so the circles are as round as possible, not the easiest thing to do!
My Ashford Table Loom is a joy to use and I really should weave on it more. I do try, and right now I’ve got an interesting warp on it. This is an 8 shaft Amalgamation draft, #79686, from handweaving.net.
I am using 2/10 merino/tencel, Colrain Lace, sett at 20 epi. I am enjoying the weaving, but just finding the time to devote to it has been a challenge.
However, the real reason I am writing this is to report on the new Ashford Shuttle Race attachment that has just become available as an add-on to their looms. It is fantastic! Before I bought it, weaving was a little fraught, I was always nervous that my shuttle might miss a warp or two on the way back and forth. Finding those errors (on the back!) was really annoying. I am hoping that the shuttle race, providing a solid base on which to slide the shuttle, will minimize any future bloopers.
This is what it looks like in place attached to the beater.
This is what it looks like with the warp in place. Sending greetings from snowy Louisville!
This is a towel woven with 6/2 unmercerized cotton in a design that originated probably in the 1940’s. I took it from a Practical Weaving Suggestions weaving pamphlet published by the Lily Mills Company in 1957, where it was attributed to someone named Heather Thorpe from 10 or 12 years prior. The design in the pamphlet is called Rhythm Pattern and was written for Crackle Weave. It came with a woven sample that caught my eye probably about 25 years ago.
This is the page from the pamphlet. It shows the Crackle threading for the Rhythm Pattern
This is the profile draft of the Crackle threading:
I wove a small finger tip towel from the pattern on an old table loom way back when:
Sidebar: We bought a c.1915 house in the 90’s that had been “updated” in the 50’s with some Mid-century modern Formica that was yellow green, complete with a kidney bean shaped kitchen table. That Formica was everywhere, but I loved it. I wove that towel as a kind of homage to the period.
But, it seems I wasn’t done with that design. About 10 or so years after that I became interested in Diversified Plain Weave using cotton and rayon chenille. I wove several scarfs in that weave, always starting with a profile draft. I seem to have lost the drafts for that scarf, probably when I switched software or upgraded my computer. Here is the scarf, again in greens:
Fast forward to now. I took the four block profile draft, expanded it, and, using block substitution in pixeLoom, transformed the Rhythm Crackle draft into a 16 harness Turned Taqueté straight draw weaving draft. I used 6/2 cotton (more greens!), because I had it on hand, not because I like it very much. But I enjoyed the process, and I think I will like it better as a scarf in 8/ tencel :-).
I recommend that you explore block substitution with this profile draft and see what you come up with!
I’ve had some 2/10 wool/tencel yarn on hand for well over a year. Don’t remember why I purchased it originally, but I believe it was on sale at the time, so there’s that. I really love the feel of it. It is very soft, and yet very strong, and ideal for both warp and weft, as well as knitting. In keeping with my palette cleansing projects, I decided to go with some wool/tencel scarves on the Ashford loom.
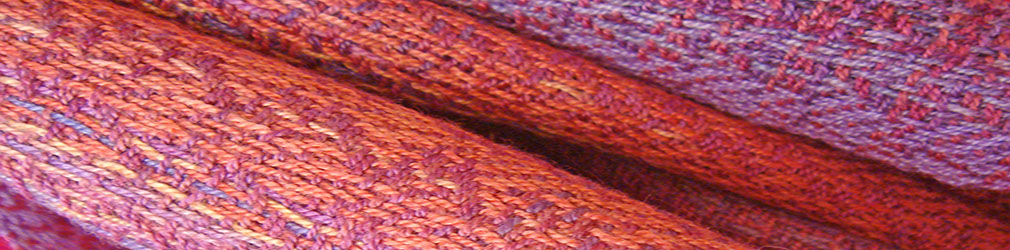
I chose a 16 harness Zig Zag twill pattern that I found on handweaving. net. This is pattern #43169, and the source is Weaving Draft 16330, 2500 Armature – Intreccio Per Tessuti Di Lana, Cotone, Rayon, Seta – Eugenio Poma, Italy, 1947. Italian translation not provided ; – ). It is super easy, threaded on a straight draw. I warped up for two scarves, purple warp and dark red weft for this one, and now I am weaving a different liftplan with a mauve for weft.
I couldn’t wait for the second scarf to be woven, so I cut this one off and put it in a Eucalan soak, then air dried it and pressed it. It is super squishy. A very nice change!
Also, I was totally using my Tempo Treadle for the actual weaving. I have come to really depend on it. One feature on the TT that I didn’t notice previously, is the time tracker. It keeps track of all the weaving time, and FYI the total for this scarf was 9 hours and change. Slow cloth, but an enjoyable process!
In September I was weaving text and getting up to speed with my Tempo Treadle setup. When I finished the Bon Appetit mat, I was pretty dissatisfied with how it turned out. If I’m honest, 16 harnesses is really not enough for a good rendering of text in weaving when using 3/1 twill or broken twills as the foreground and background. The letters aren’t scaled up enough for clarity, and it kind of all turns to mush when it is washed. Sigh.
So I needed a change of pace, a palate cleanser, if you will, and the stars aligned quite nicely when I decided to turn my attention to the pattern called Vlak-in-Vlak-in-Vlak. This pattern is woven in Summer and Winter. It has been floating around the interweb for a while. It’s very intriguing. But it’s hard to find it. Links to it are good for a while and then they don’t work anymore. Years ago, somehow I had managed to find a Dutch language copy of the pattern and printed it out. That’s the first part of the story.
The second part of the story is a posting by Bonnie Inouye on a Ravelry Warped Weavers forum on Drafting Turned Taqueté. In 2020 she whipped up a short tutorial and drawdown using just part of the Vlak pattern in Turned Taquete using 12 harnesses. I became obsessed with working this out myself using her method, and I finally was successful. For those interested, this is the link to that posting. (You have to be a member of Ravelry, BTW. Scroll down the page until you find a posting titled “Creating TT drafts with blocks or Images”). The point of this exercise was to draft a Turned Taqueté design with clean lines separating the elements, rather than moving along a diagonal or a curve.
So I was a busy little bee for a while, working on the draft, working on the colors that I ultimately chose. Eventually I came up with this draft:
And I posted it on my Facebook page. People seemed to really like it. I was really excited. I started weaving, and it looked really good. I began thinking that I might work up a pattern for it that I could put in my Etsy shop.
However, I knew that at some point I would have to contact the designer of this wonderful draft. Who turns out to be Ineke Elsinga of the weaving studio Tissien in Haarlem, Netherlands. I emailed concerning my use of her weaving draft, and she kindly informed me that the pattern is copyrighted. Also, it isn’t free. She sent me the link for purchasing the pattern and I did so. The website for Tissien is in Dutch, so when accessing it, it works better if you use a browser, like Google Chrome, with a translation feature. But even if you go to the website, the pattern link is hard to find. So, if you would like this pattern, which costs 15 Euros, here is the link that will get you there:
In my last post I was just putting together the Tempo Treadle and getting it to the point of turning it on. Now I’m practically a seasoned veteran. Well, almost. I have now threaded and treadled and completed a project and I am very satisfied with my experience. However, I do have a question or two for the hive.
My warp was for another text project. The threading order is very easy, but I made use of the Thread Assist function to keep me on track.
I chose to have the screen show 8 warp threads at a time. The Thread Assist not only keeps track of harnesses, but also of color changes in the warp. I did notice that I had to enter exactly the right amount of warp threads in my threading draft (wif). That way I didn’t have to start over on the screen. Also, the Thread Assist keeps track of where I left off when I start again after some time away.
When I finally got started weaving, there was definitely a learning curve with the Weaving function. Since I have and was using all 16 harnesses, the screen I was using could only show one line of the liftplan at a time. I’ll take you through a sequence of two picks.
This shows the “next” pick with the levers in the neutral position, i.e. not pulled. Blue is the color for the levers that I want to pull.
When I pull those levers, the magnets engage and then the screen changes to this, showing the levers that need to be lifted (in red), the levers that need to be pulled (blue) and the levers that remain unchanged (green). This pick consists of harnesses 1, 2, 4, 8, 12, and 16.
Next, the levers in red are lifted, and the ones in blue are pulled, joining the ones in green. This pick consists of harnesses 1, 3, 4, 5, 9, and 13.
Things happen fast, and you have to pay attention! Ask me how I know 🙂
So the above picture shows the beginning of my weaving and I was pretty proud of myself. I quit for the day and started weaving again the next day. Thinking that I could just start up again from where I left off, I continued with my routine and wove for about an hour. It wasn’t until I got up to advance the warp that I noticed the floats on the top. They are visible on the left side of the mat.
I was not watching the weaving, I was watching the screen and pulling the levers and skipped a pick in the sequence. It turns out that picking up where you left off is somewhat tricky! So, I began writing down the SEQ number (upper left corner) and the actual harness numbers of the next pick before shutting down the Tempo Treadle. Otherwise, I became very confused as to exactly where I was in the sequence.
I would love to hear from more experienced Tempo Treadle users (16 harnesses) who may have faced this situation as well. Do you have a fool proof method of knowing what the beginning pick is when starting a new session?
Meanwhile, I am still not satisfied with my text weaving. Going back to the font drawing board. Stay tuned…
Say hello to Tempo Treadle. I hope Tempo Treadle will become my new best friend when I am weaving on my Ashford Table Loom. It will keep me from pulling the wrong levers and hopefully speed up the weaving, as much as you can possible speed anything up, that is. Tempo Treadle arrived a few weeks ago and, between this and that, I haven’t got it completely up and running until now.
When it arrived, I immediately went to social media to find out what I could about setting it up on an Ashford 16 Harness table loom. It came with directions, but I am a very visual person, and I needed more photos than what I was getting. There are a few videos on You Tube by the Lofty Fiber folks (makers of Tempo Treadle). But the list of videos doesn’t cover all the looms that it is made for.
Therefore, I thought I would document my set up process and post it here for any Ashford Loom owners who might be wanting more photos.
The first thing I did was remove all the treadle number stickers that I had attached to the loom when I first got it. No apologies about the accumulated “patina” ;-).
Next, I attached the magnets to the levers. (In the photos the magnets are white. This confused me at first, because I can be very literal. As it happens, mine are black.)
Next, I attached the Tempo Treadle “holder” to the top of the loom behind the levers. The Tempo Treadle box itself fits right in. Here are front and side views.
The power source cord plugs in at the top and it is long enough to reach to my electrical outlet close by.
There is a small extension cord with a switch, which is helpful for turning Tempo Treadle on and off without having to just pull the plug in the wall.
There is a magnetic strip that attaches to the loom with adhesive just under the castle. Two connectors come out at the left and attach to connectors coming from the Tempo Treadle box.
A attaches to A and B attaches to B.
This is the finished setup.
And, this is what it looks like when you turn it on.
The Tempo Treadle comes with a mini memory card and two different readers that connect to your computer. I have tried both and they work just fine. I have put two wifs on the memory card and actually tried running through a treadling sequence, briefly. There will be a learning curve.
I am currently warping this loom for another text project, and will be taking photos as I go, so I will be posting about that experience … soonish.
Ok, I’ve had comments on the Tempo Treadle, and basically what I’m hearing is that it is the best tool I could possibly have for weaving on a 16 harness table loom. Based on this information, I went ahead and took the plunge. I think there is a wait time for orders to be fulfilled, so I’m not going to hold my breath until it gets here. I will probably start a new project and add the Tempo Treadle whenever it gets here.
Just when I thought I might never stop geeking out on woven circles, along comes a new obsession. This one is harder to get my head around. It is imprecise. It takes a lot of technical deep diving. It hardly ever turns out the way I picture it. But it is so intriguing that I can’t stop. Won’t stop.
Weaving words.
Here is the drawdown for my first weaving since back surgery. Mind you, I haven’t even wound the warp yet. It has taken me pretty much the entire recuperation month to get this far. But soon, I will be winding a warp for towels on my 16 shaft Ashford. You are looking at front and back, upside down:
I got inspired for this when I was going through the tutorials in Alice Schlein’s book The LiftplanConnection: Designing for Dobby Looms with Photoshop and Photoshop Elements. Along with all the other chapters (including one one circles!), she has a chapter on weaving text. Granted, this technique works better with 24 and 32 harnesses, but it is still possible with 16.
Without going into too much technical stuff, it is necessary to have installed a set of pattern presets in Photoshop. Working with layers, the presets are copied into designs on a grid, foreground and background. When finished, the grid represents a liftplan that can then be pasted into a weaving program. Thanks to the Complex Weavers’ lending library, I was able to gain access to the preset library from the book The Woven Pixel by Alice Schlein and Bhakti Ziek.
I also consulted an online tutorial by Margaret Coe, which was much less comprehensive, but still helpful, and began using Photoshop Elements in addition to Photoshop 2020.
You can see already that this is a fly by the seat of my pants operation. Photoshop 2020 does most of what I want very well. Photoshop Elements picks up the slack. (This is much like my relationship with Fiberworks and PixeLoom. They each have their strengths.)
I plan to wind a prototype warp and weave a couple of towels for myself. Glad to be about to be weaving again! FYI, I am slowly opening up my Etsy shop to other items besides the digital patterns. Yay!
It was the best of times. It was the worst of times. Worst: well, no need to explain that. Best: unlimited weaving with no end in sight! Woohoo!
On my eight shaft loom I’ve got a dishtowel warp in 8/2 unmercerized cotton in blues and greens, and I threaded it for Turned Taqueté according to the ideas I was exploring in my last post. I threaded a straight draw following a light/dark color sequence all the way across. I used a two-block profile draft from Jakob Angstadt. The first block is on harnesses 1-4, and the second block is on harnesses 5-8. The design is symmetrical, and I am keeping to color combinations of dark/dark, dark/light, light/dark and light/light in treadling.
This is the first towel, for which I used only a dark blue weft.
This is the second towel, for which I used only a light weft:
And the underside:
As you can tell, I’m big into the checks. And there a few different ways I can play this. I have four more to go, so my next move is to plan number three.
I alternate days weaving on the 8 shaft, and days weaving on the 16 shaft looms. I am well into the second ever warp on the Ashford, this time weaving scarfs in 8/2 rayon threaded to a sixteen shaft straight draw.
This is the first one, now off the loom:
This is the second one, an undulating twill:
This is the third one, just started:
I am still struggling with the warping, and decided to order a raddle kit for next time. The warp sticks provided are very thin cardboard and I decided I really don’t like them, so will switch to wood warp sticks. Plus I will figure out a better way to weight the warp as it is wound on.
I do enjoy the slower, more focused pace that the table loom requires. And I am dazzled by all the pattern possibilities. One of my goals with this loom is to explore more ways to weave circles, a design motif with which I am perpetually obsessed.
I decided to put my Etsy shop on indefinite Vacation Mode, thus avoiding a lot of unnecessary trips to the post office. However, I will be adding to the inventory, so whenever I feel safe enough to go out more, there will be lots of new stuff.
And, I am reading Hilary Mantel’s A Place of Greater Safety, her first novel, although it wasn’t published first. It’s loooong, and I love her style, and it focuses on characters in France before and during the Revolution. I thought the title was entirely apropos 😉 .