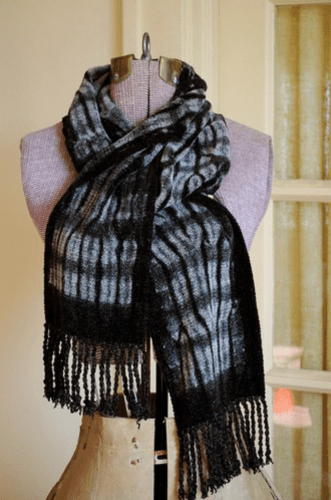
Woven Shibori Scarves – Well, Finally!

(This blog post was originally published August 2, 2016 on my first blog site, which is no longer in existence.)

I was preparing to list these Woven Shibori scarves in my Etsy shop (see button on the right!). As I sometimes do, I got out my trusty weaving notebook to refresh my memory about the details of these scarves. Turns out I started this project in December of 2015. What??? Could that be true?

I started the planning in December. Somehow, during the holidays, I got the warp wound and on the loom and started weaving. I blogged about the weaving on January 2016. And I blogged about the scarves again on March 12. This picture accompanied that post, so clearly I had been working. Off and on.

photo-20160312085750601

It’s all a blur now. There was so much going on at the time with the house sale and all the work that was going on regarding that. I’m surprised I got this much done. Still, it’s shocking how long it all took.

My notebook contains only the bare bones of the project. Warp: 2000 ypp white rayon chenille sett at 20 epi. Advancing twill threading with a 48 end repeat and a total of 192 warp ends. Plus two floating warps that were really unnecessary. I have a printout of a drawdown. And I have three treadling order printouts for the pattern shots. Five scarves. Three printouts. I must have used two of them twice. Who remembers?

And that’s all she wrote. I thought I would have recorded my dye colors. But no. This one is probably melon and overdyed with deep purple. [Ed. note: turns out I did mention dye colors in the previous post. ;-)]

woven-shibori-2-03-copy

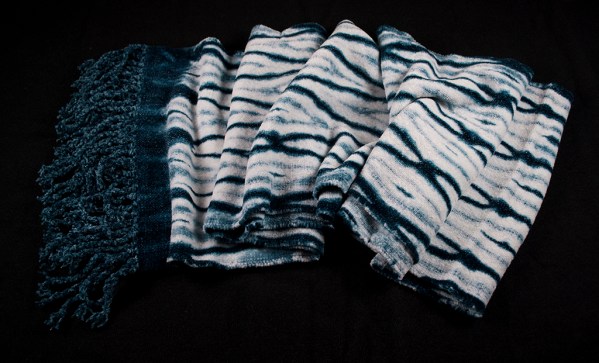
This one is blue, overdyed with indigo. I do remember the indigo dyepot. Vividly.

woven-shibori-indigo-1-04-copy

The next two are indigo on white.

woven-shibori-indigo-3-02-copywoven-shibori-indigo-2-05-copy

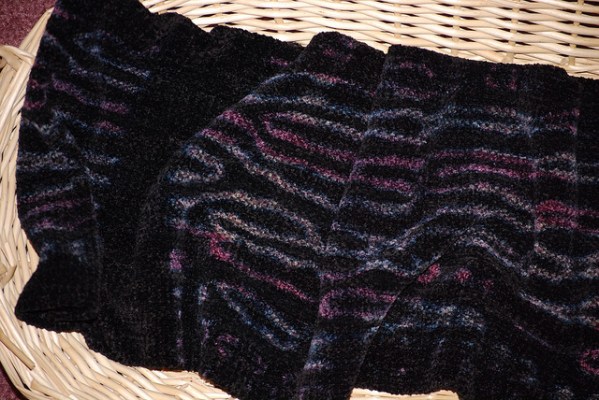
And this one is burgundy, overdyed with black.

woven-shibori-1-02-copy

That’s it. That’s all I can remember. Eight months is way too long between weaving projects. I need to get busy, and I do plan for some dishtowels very soon. And there will be notes.

I have the yarn in a bin somewhere or other…

Very Slow Cloth

photo-20160312085750601(This blog post was originally published March 12, 2016 on my first blog site, which is no longer in existence.)

Just realized it’s been almost two months since the last post. Much is happening Chez iowaweaver and much more is going to be happening very soon. We are still getting the house ready to sell, and it is a hard slog, but we are getting there. I had surgery a week ago Monday (planned, not an emergency, but definitely putting a crimp in my style). But, I have scarves to show off!

I am done weaving until after the move. All the yarn, except for some skeins of sock yarn for knitting, is in storage. My last warp was for a batch of Woven Shibori Scarves (see my previous post). I ended up with five scarves, quite a lot for me, as I am not really a production weaver.

I used a threading from the book Woven Shibori by Catherine Ellis. It’s an advancing twill on 8 harnesses, and for each scarf I did something different in the treadling to minimize the boredom factor (see my previous post). So, when dyed, each one has a slightly different look.

Technical details: I used 2000 yards per pound rayon chenille sett at 20 epi. The pattern threads (see my previous post) were 6 ply DMC embroidery floss that I bought on the cone at Walmo online. FYI, embroidery floss works really well here. It’s strong, cause you need that for gathering the scarves and tieing them for dyeing.

I used an indigo dye kit by Jacquard for three of the scarves. If you haven’t tried this dye method yet, I highly recommend it. It’s super easy if you follow the directions. The kit makes a ton of dye, and you can pretty much go crazy with it until it’s finally used up. Fair warning: it smells…. earthy…  And you’ll need a five gallon bucket with a lid to keep it in.

Indigo is considered a vat dye, where the goods to be dyed are submerged in the dye pot. So, after drawing up the pattern threads very tightly and tieing them on each scarf, you dip them in the dye bucket and kind of swirl them around for about a minute or two. It doesn’t take long! The scarf on the left had been dye-painted with a light blue fiber reactive dye for a base. The other two were left completely white.

shibori-chenille-indigo

The other two scarves were dye-painted in other colors with fiber reactive dyes. One was dusty rose, the other coral pink. When it came to the shibori dyeing faze, I again painted the dye on, On dusty rose I used black dye, which rinsed and dried to a dark dark burgundy. On coral pink I used purple.

photo-20160312085750603

After rinsing and drying well, the scarves kind of sat around for a long time until I felt well enough to start cutting the embroidery floss threads and revealing the underlying patterns. I then machine washed the scarves to get the pleats out and get a real look at all of them.

Next step will be to wash them (again) and dry them in a dryer so I can finally pull out the headers and twist the fringes.

Slow? Yeah.


Boooooooring!

(This blog post was originally published January 15, 2016 on my first blog site, which is no longer in existence.)

It’s been a while since I tried my hand at Woven Shibori. I looked back to my previous blog posts and I was astonished at just how long it’s been. My first one was in 2010. Yikes.

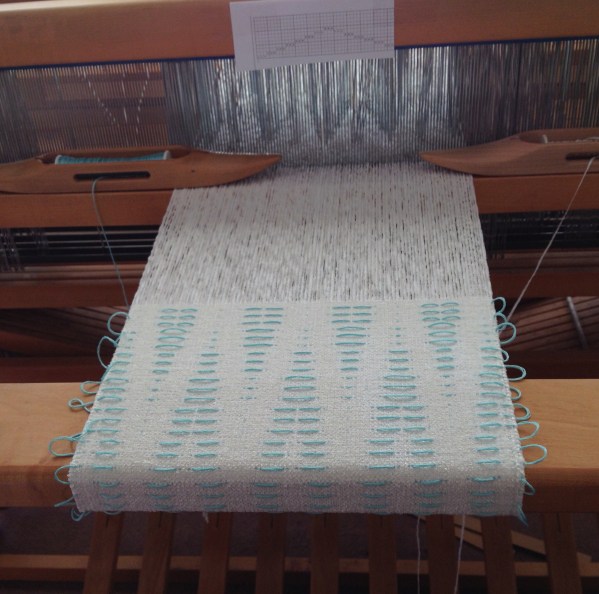
So, there are a few reasons why I wouldn’t necessarily call Woven Shibori my favorite technique. You’ve got an all white rayon chenille warp and weft, broken up by the occasional shot of aqua embroidery floss. And there are yards and yards and yards of it.
Still, it has its attractions. The real reward comes with the big reveal after all the dyeing.
But, the title of this post pretty much sums it up.

photo-20160113151010179photo-20160113151230311

Reasons for this warp there are:
1. We are packing to sell the house and move. I have very little yarn left that is isn’t in storage. But I did have a huge cone of white 2000 ypp rayon chenille.
2. I still haven’t packed my dye stash, and expect to paint a bit more yarn before that happens, so dyeing is still something I can do quite readily. And this project should use up a lot of dye.
3. I have an indigo dye kit that I purchased a few months ago that would be nice to use.
So, I put in my time every day at the loom until my neck tells me to stop. I’m weaving about one third of a scarf per day. I could be done sometime next week. Then it will be time to fold up the loom.

Woven Shibori – The Adventure Continues

(This blog post was originally published January 11, 2011 and April 19, 2011 on my first blog site, which is no longer in existence.)

In this repub I will be combining blog posts, keeping the really essential bits about Woven Shibori and flushing the bits that no one wants to read about ;-).

Part the first:

I had plans for a new Woven Shibori wide scarf project. I researched patterns on handweaving.net and found an undulating twill pattern for 8 harnesses that I liked and played around with it on pixeloom. I got a warp wound and halfway threaded. I was going to finally get back to it and then the holidays and my holiday knitting kind of got in the way of any serious weaving.

But I thought I would share my draft. I am actually using the sequence on the left which starts with two repeats of a straight draw, then a zigzag in the middle, then two repeats of a straight draw.

This is the drawdown. What I had in mind was an ogee motif repeated across the scarf. See this article on Ogees for more on that subject.

shibori-drawdown-1

Part the second:

[After the holidays] my woven shibori project moved slowly but it did progress. I got the first scarf off the loom and tied up all of the shibori threads. I had decided to paint the scarf with one color (rust) on one side, wait a bit, and then flip it over and paint the scarf with a different color on the other side. I did this in my dungeon (basement) dye studio. The scarf was just the right length to stretch out on the “table” that I use to paint yarn.

So first I soaked the scarf in my tub of water and soda ash.

chenille-shibori-green-5

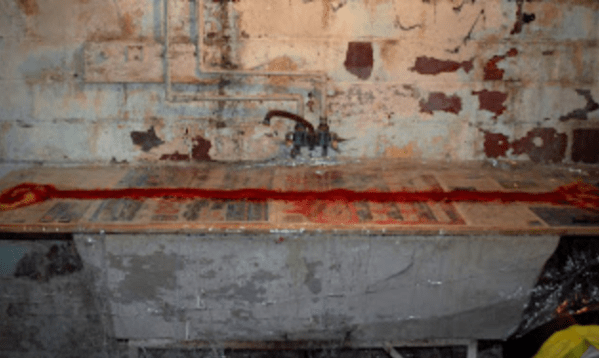
Then I stretched it out on my dyeing “table” and painted it with the rust color dye.
chenille-shibori-green-6

As you can see, my “table” is a piece of plywood placed on a non-functioning laundry sink. Not very glamorous, but it is a space that suits my needs and as an added bonus, nobody else in the family would ever consider wanting to use it.

So I have that scarf dried and the ties pulled out. It’s very interesting to note that the dye didn’t really penetrate to the other side very much, with either color. So the scarf is kind of reversible, colorwise.

I have finished weaving the second scarf, with a slightly different tie-up, with longer floats. I am in the process of dyeing it, and there will be two steps. The first was to paint it all over with aquamarine dye, which makes the light yellow a pretty aqua-green. Then I will dip-dye the scarf in a tub with a good medium blue.

To be continued….

Part the third:

When I last blogged about my latest woven shibori project, I had just dyed the first scarf in a two-scarf warp by painting it, front and back, one side with rust orange and the other side with brown. That scarf turned out ok, but I didn’t like the pattern. The undulating twill was way too elongated, and it was kind of broken up. The lines weren’t smooth enough for my sensitive eye.

So my next move was to alter the tie-up for the second scarf. I made the floats much longer with the hope that the pattern would be more clearly defined. I also changed the treadling so that each pattern shot was done twice (last time I did each pattern shot three times). Here is the latest weaving draft which reflects all these changes:

shibori-drawndown-2

So I wove the scarf (a process that took quite a while, as I was doing a bit of knitting as well). I pulled up the shibori pattern threads and tied them. Then the dyeing began. I decided to do two colors. The base color of the scarf is a light yellow, so the dye colors had to be able to go well with that color. I chose aquamarine for the first color. And I put the soda-soaked wet scarf in a plastic tub and basically poured a half liter of dye solution all over it. I squeezed it and turned it over and over, making sure that the scarf was completely covered by the aquamarine. Then I covered the tub and left it for about a day. I went through the rinsing out, and hung it up to dry.

No rush.

My next move was to mix up some bright blue dye, enough for the weight of the scarf and filled a tub with about three inches of dye solution. I soda-soaked the scarf again, and then draped it over a couple of lucite dowels so that just the ends of the scarf were dipped into the dye solution. I left this for a few hours, maybe overnight, memory fades….

Anyway. I rinsed it out, and then I went away for about a week and a half, and I couldn’t see the finished product until I got back home. The suspense!

So, here are some pics. This is the scarf, with the ties still in:

chenille-shibori-green-2

And here is the scarf modeled by the lovely Stella:

chenille-shibori-green-4

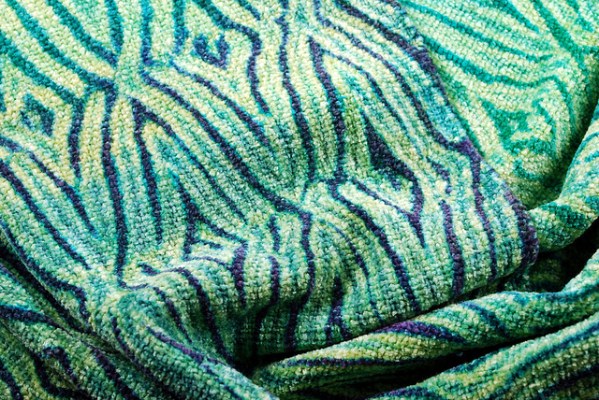
And here are a couple more pics, purely for eye candy:

chenille-shibori-green-1chenille-shibori-green-3

Woven Shibori (part deux)

(This blog post was originally published November 4, 2010 on my first blog site, which is no longer in existence.)

When I last blogged about woven shibori scarfs I was warping my loom with commercially dyed rayon chenille. After weaving the scarfs I planned to first overdye them with Dharma Brilliant Blue fiber reactive dye, which was pretty much the only color that would work with red and pumpkin. Then I would tie the resist threads, and overdye again with Dharma Jet Black.

It took a while, but now the results are in, and by the way, Woven Shibori is awesome.

With a two-block Monk’s Belt for the pattern, I wove the first scarf with pumpkin weft, and did an immerson dye bath. For the second scarf, woven with red weft, I painted the dye on just like I do with painted yarns. For the record, painting the dye is the preferred method from now on.

When you do an immersion dye bath with fiber reactive dyes, the process is fairly labor intensive. You have to mix the dye and the salt with the water, immerse the fabric or yarn, and stir constantly for about 10 minutes. You add the soda ash at prescribed intervals, and stir some more. With yarn, this isn’t so messy. With woven fabric, it feels more awkward stirring a piece of stiff, wet rayon chenille and you really have to watch for splashing.

When the first scarf was rinsed and dried and the resist threads were tied, I did another immersion dye bath, this time in Dharma Jet Black. The black rinsed out into charcoal gray, however, and I think I must have gotten the measurements wrong for the weight of the scarf. But, still, I quite like the result.

shibori-overdye-4

The columns of dyed areas flow back and forth with the stripes in the scarf quite nicely, and I think the color values work well.

For the second scarf, I painted the Dharma Blue on, just like I paint yarns. First I soaked the piece of fabric in a tub with water and soda ash for about 20 minutes. Then I wrung it out, and put it on a table lined with plastic. I mixed up the dye in a plastic bottle, then squirted iit on the fabric, working it in with a foam brush. Easy peasy. No splashing involved. Of course, the slow cloth factor increases with this method, because the dye has to cure, covered with more plastic, for about 24 hours before being rinsed out.

After rinsing and drying and pulling up the resist threads, I then put the second scarf in a plastic tub and squirted a half liter of very concentrated Dharma Jet Black dye solution all over it. I covered it up with a towel, and let it sit for another 24 hours, turning occasionally. Were it not for the fact that I broke one of the resist threads when tying them, which resulted in a black stripe in the mid portion of the scarf, I would say that this is the best woven shibori scarf yet.

shibori-overdye-5

This darker scarf has a richer, more dramatic look.

More shibori to come!

Woven Shibori and Adventures in Slow Cloth

(This blog post was originally published September 8, 2010 on my first blog site, which is no longer in existence.)

I was so jazzed by the idea of woven shibori (see previous post), that I started thinking about all the commercially dyed chenille in my stash that I could re-purpose using this technique. I have a bunch (under 10 lbs.) of commercially dyed rayon chenille, in colors that are okay, but not wonderful and in a weight that is a bit heavier than I use for my dye painting. And I thought, wouldn’t it be a hoot great idea to use up these not-so-great colors of yarn by overdyeing with some better colors, and have some fun with shibori at the same time?

So I chose some tepid red and some off-pumpkin and warped those two colors in stripes. When I got them to the loom, they kind of reminded me of really bad school colors.

shibori-overdye-3

Which led me to thinking that I could overdye the scarf once, when it came off the loom, then pull up and tie the shibori pattern threads, and then dye the scarf again, thus adding a third color in the semi-controlled shibori patterning.

I chose Dharma Brilliant Blue for the overdye, but decided to try it out on sample skeins to see what colors I would get. Here you see the before and after:

shibori-overdye-1

shibori-overdye-2

I went to the Cushings website for some guidance on what to expect when overdyeing. (The Cushings overdyes are for acid dyes on wool, but I figured the colors would be in the ballpark for fiber reactive dyes on rayon.) The off-pumpkin turned into a nice gray which was predicted by Cushings, but the tepid red turned into burgundy, which I didn’t expect. Cushings predicted blue over red would yield purple. I’m not complaining, mind you. It’s all part of the adventure.

Stay tuned.

Rayon Chenille and Woven Shibori – OMG!

(This blog post was originally published August 19, 2010 on my first blog site, which is no longer in existence.)

chenille-shibori-scarf

I just finished a rayon chenille weaving project that was a few weeks in the works, mostly because of travel and not procrastination 😉 . I was using the dye resist technique known as Woven Shibori and popularized by Catharine Ellis in her book by the same name.

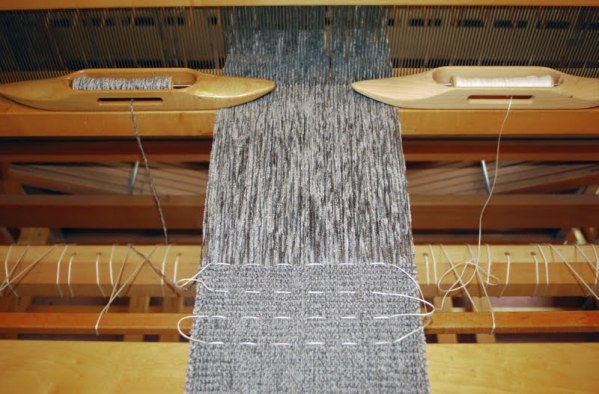
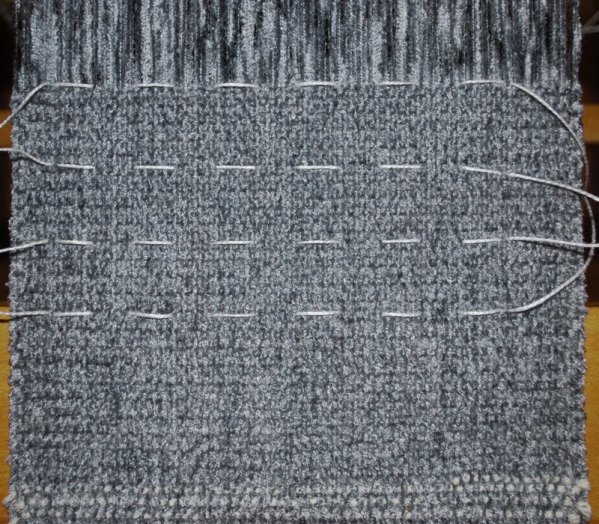
I’ve been meaning to try this technique for some time, and having the summer basically off to pursue my projects meant I had no excuse. The technique involves weaving the scarf first before any dyeing happens. I chose some light grey chenille that I’ve had for perhaps a decade. You weave it with pattern wefts inserted every inch or so in some strong thread that will be gathered up and tied once the scarf is off the loom.

chenille-shibori-1

chenille-shibori-zoom

I chose a simple four harness (two block) Monk’s Belt pattern, using 5/2 pearl cotton for the resist thread. I chose that cotton because it was the only thread I could find in the stash that wouldn’t break when I pulled on it very hard. (That’s important.) The gathering of the scarf creates the resist, and it has to be pulled very tightly. I ended up re-tieing after I’d done it once, just because I wanted it to be good and tight.

screen-shot-2016-11-29-at-8-05-47-pm

The next step is to overdye the scarf with a darker, or contrasting color, obviously a color that will harmonize with the original yarn. I decided to go with black. I dyed the scarf using my usual procion dye procedure for rayon yarn. After doing that I rinsed and rinsed and rinsed (because black is stubborn), and let it dry. I ended up waiting for 3 weeks to get back to it, and cutting all the pattern knots, revealing the resist (undyed) areas inside.

The scarf dried in pleats. So I washed it again, and dried it in the dryer to soften the chenille and all the pleats washed right out. I have a lot of commercially dyed rayon chenille in different colors, and this is the perfect stash-busting technique for those cones.

Here’s one last detail photo of the finished scarf.

chenille-shibori-detail