I’ve always been intrigued with this design.
I found it in the book A Handweaver’s Source Book: A Selection of 146 Patterns from the Laura M. Allen Collection, edited by Marguerite Porter Davison. It is the first pattern in the book, appearing on page 12. This pattern collection differs from most in that the draft is given in a shortened version and it is assumed that the weaver will be able to derive a useable draft from the information given. Certain conventions apply: a standard twill tie-up and tromp as writ treadling.
Meanwhile, I have been studying Marian Stubenitsky’s Weaving with Echo and Iris. I love the designs in this book, and I wanted to weave them, but I also wanted to understand how to take a profile draft all the way to a Turned Taquete draft. Not easy. Not intuitive. Also, when I try to get my head around network drafting, which Stubenitsky relies on a lot, my eyes roll up in my head, and I reach for a glass of wine.
In this post I will take you through the steps that (I hope) will get any weaver from a four harness pattern draft to an eight harness Turned Taquete fabric. (Disclaimer: I’ve only done the one design, so this process is only for the bravest of the brave. Expect setbacks. But persevere.)
First Step: Take the pattern and write it as a four block profile draft. Treadling is tromp as writ.

Second Step: Rewrite the four block draft as eight blocks. (You will need eight blocks to translate to eight shafts in order to interleave the threading.) Treadling is still tromp as writ.
Here is the eight-block threading, also known as the Design Line:
In her book, Stubenitsky devotes a huge amount of space to four-color threadings, but I was more interested in two-color threadings. I zeroed in on interleaved threadings that can be woven as Turned Taquete, see pages 195-199. Once the eight block Design Line is established, the next step in the book is to take the line and pair each end on a 1/1 network. Since I don’t do Network Drafting, I prefer to just say, Pair each end with its up or down partner without increasing the total number of ends. As I see it, this pairing of ends in the Design Line will create more of a flow in the design, easing the blockiness of it.
So this is the Third Step and this is what that draft looks like:
Notice that the tie-up is now 4/4 and the treadling is still tromp as writ. Here is the threading:
The next step is to interleave the paired threading at an interval of your choice. I decided on an interval of 4, but you could do 3. This is why we have weaving software. I went to Threading, Echo, and chose my interval, and then voila.
Fourth Step:
Now the number of warp ends has doubled, and has two alternating colors. Later I will change the black and gray to aqua and magenta. The weft will be lavender.
Fifth Step:
Adding tabby treadles to the tie-up (10 treadles are necessary here) and inserting tabby shots to the treadling draft. One repeat of the threading is 264 warp ends. One repeat of the treadling is 264 weft shots. I doubled the threading to 528 ends. One, because you really need to do that to get the full impact of the design, and two, because my warp was sett at 56 epi and I wanted more than four inches in width. Here is the treadling draft and tie-up:
This color draft shows the final result.
I was a bundle of nerves getting the warp on the loom and starting to weave. The warp is 20/2 tencel sett at 56 epi, and it took forever to thread the heddles. The tencel itself is a joy to work with and it wound on just fine. I wove a few inches and was so overjoyed that it actually worked that I forgot that I was weaving top to bottom instead of bottom to top. In addition, I am weaving the back as the front. Yikes!
I threaded the warp colors magenta/aqua instead of aqua/magenta. Turns out that makes a difference ; – )
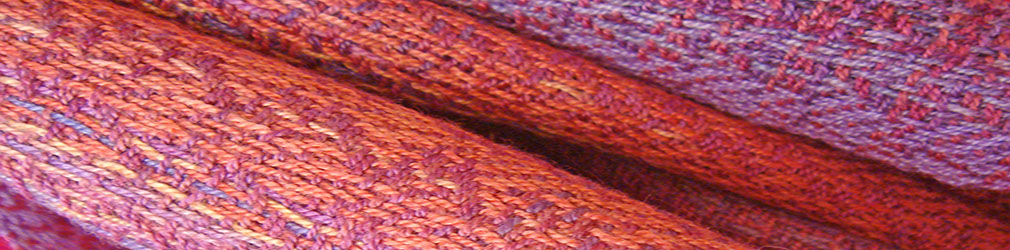
A few photos:
I’m using 20/2 tencel as the weft, but I’ve been reading about projects with 30/2 tencel or 60/2 silk as weft. If I had used a finer weft, the pattern motif would weave with less length. I will wait and see what the final result looks like once off the loom and washed and pressed. That 30/2 tencel is kind of hard to find, and silk is really not in my budget.
I’ve got enough warp for a second scarf, and I will try a different color weft instead of lavender for that one. Meanwhile, back to the loom!