(This blog post was originally published December 30, 2011 on my first blog site, which is no longer in existence.)
One of the many projects I’ve had simmering in the studio for a while has been a Diversified Plain Weave scarf using rayon chenille and cotton. Diversified Plain Weave is a clunky term for an elegant weave structure that produces a lovely, supple rayon and cotton fabric. You can use other materials including wool or silk, but rayon and cotton is what I have around, and (especially the cotton) need to use.
Diversified Plain Weave (hereafter referred to as DPW) has been around for a while. Klara Cherepov produced a small book on it in 1972, which I checked out from the university library. I found it cryptic and unreadable, much less something I could actually use in the studio. This “classic” DPW relies on pretty strict rules concerning threading and weaving. Each pattern block consists of two shafts, in addition to two tie-down shafts. Odd and even shafts must alternate. Many other rules must be applied.
Madelyn van der Hoogt’s article titled “Thick ‘n Thin Again” in Weaver’s Magazine (Summer 1997) is an excellent summary of “classic” DPW, the pros and cons. However, in this article she introduces a new and improved DPW that eliminates all the hassles of the original, and this totally got my attention.
In this new and improved version, blocks are threaded and woven independently of each other, and do not have to follow a prescribed order. In other words, DPW was transformed into a true block weave. Each block consists of two thin tie-down threads on shafts 1 and 2, and a thick pattern thread on a third shaft. For my scarf I used 1200 ypp rayon chenille in black for the thick warp and 40/3 cotton in black for the thin warp. For the weft I used 1200 ypp handpainted rayon chenille for the thick weft, and 40/3 cotton in black for the thin weft.
Here is a shot of the scarf on the loom:

It was threaded 24 ends per inch, 2 thin threads and 1 thick thread per dent in my 8 dent reed. I added a floating selvedge on each side. I made the warp 9″ wide, and wove 70″, not including fringes. When I got it off the loom it had shrunk to 8 1/4″ in width and 68″ in length. After zigzagging the ends I soaked the scarf in the sink, rinsed it, and spun out the extra water in the washing machine. At the laundromat (don’t own a dryer, never have) I dried it only until damp-dry, then laid it out flat at home to dry the rest of the way. It had shrunk to 6 1/2″ x 60″, a whopping 15% shrinkage in length, and 18% shrinkage in width. That was quite a surprise, but good to know as I plan to do a lot more of these!
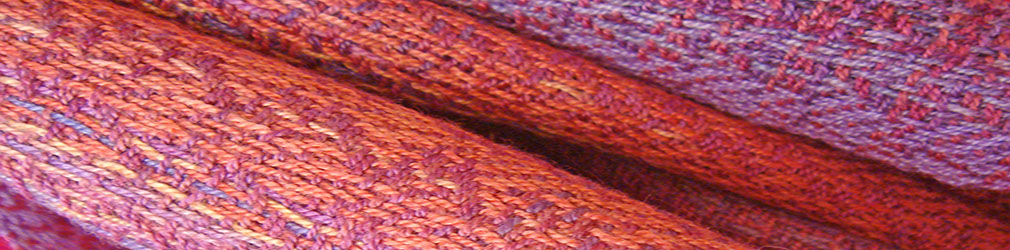
Here is a shot of the finished scarf:

The underside of the scarf is the opposite of the top side: the black becomes handpaint and the handpaint becomes black. It’s pretty cool.
What I would do differently:
•I would wind the two tie-down warps together from two separate spools along with the thick pattern thread, thus eliminating the need to stop and cut the warp every time I change yarn. (I may have been weaving for 40+ years, but I can still do stupid stuff with the best of them.)
•I would put the handpainted yarn in the warp instead of the weft, thus eliminating the stripey effect that handpainting yarn naturally causes.
Here is the profile draft that I used

Each block in the threading represents 2 tie-down threads and 1 pattern thread. Each block in the treadling sequence represents 2 “tabby” shots and 1 pattern shot. (Please note that you do not get a true tabby with this threading.)
And here is a sample of my actual drawdown:

The threading sequence goes: tie-down thread on 1, tie-down thread on 2, pattern thread on 3, 4, 5, or 6. This three thread sequence can be repeated at will and you can follow any pattern block with any other pattern block, odd or even.
This is the beginning of a beautiful friendship.